How to Create a Website Using WordPress: A Step-by-Step Guide
WordPress is the most popular content management system (CMS) in the world, powering over 62% of all websites that use a CMS. It is widely preferred due to its user-friendly interface, flexibility, and vast library of themes and plugins. If you want to create a website using WordPress, this guide will walk you through the entire process, from selecting a domain name to customizing your site.
Table of Contents
Step 1: Choose a Domain Name
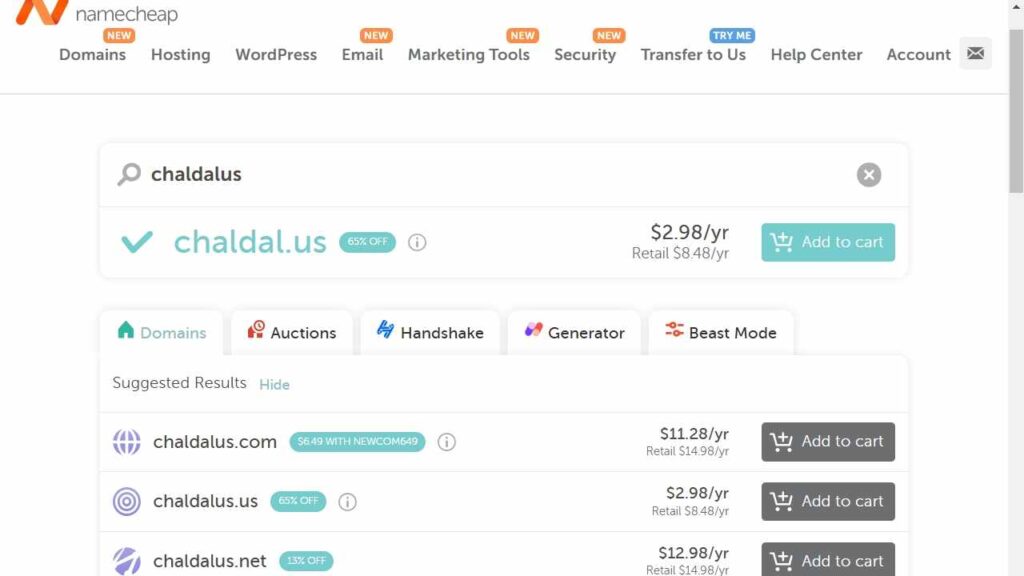
The first step in creating a website is selecting a suitable domain name. A domain name serves as the identity of your website and should be easy to remember, relevant to your brand, and unique.
Tips for Choosing a Good Domain Name:
✅ Keep it short and simple.
✅ Use keywords related to your business or niche.
✅ Avoid numbers and hyphens.
✅ Check for domain availability using platforms like Namecheap or GoDaddy.
Once you have chosen a domain name, ensure it is available and proceed with the registration process.
Step 2: Register Your Domain and Select a Web Hosting Provider
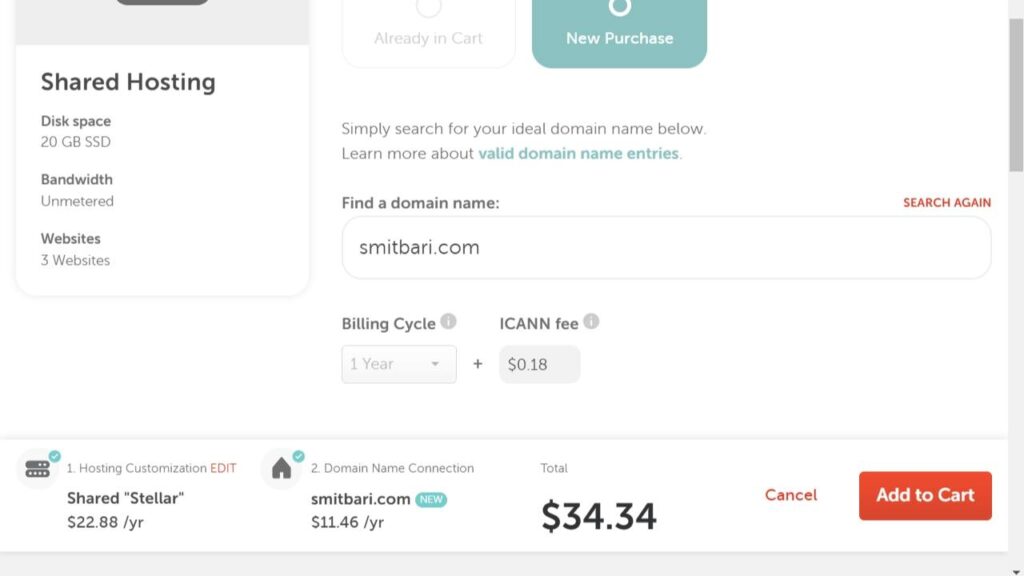
After selecting your domain name, you need to register it and choose a web hosting service. Web hosting is a service that stores your website files and makes them accessible online.
Popular Web Hosting Providers:
- Bluehost (Recommended for beginners)
- SiteGround (Great for performance and security)
- Hostinger (Affordable and reliable hosting)
When purchasing hosting, ensure the package includes features like one-click WordPress installation, SSL certificates, and customer support.
Step 3: Install WordPress
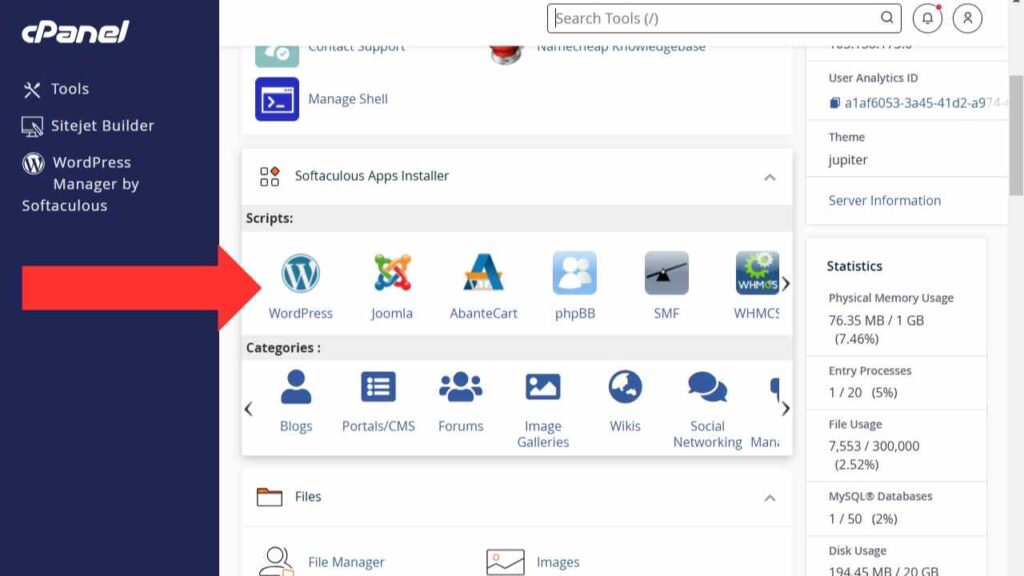
Once you have set up your hosting account, the next step is to install WordPress. Most web hosts offer a simple one-click WordPress installation.
How to Install WordPress via cPanel:
- Log in to your web hosting account and go to cPanel.
- Look for Softaculous Apps Installer or WordPress Installer.
- Click Install and enter details like site name, admin username, and password.
- Click Submit and wait for the installation to complete.
After installation, you can log in to your WordPress dashboard by visiting
yourdomain.com/wp-admin.
Step 4: Choose and Install a WordPress Theme
A theme determines the design and layout of your website. WordPress offers thousands of free and premium themes that you can customize according to your needs.
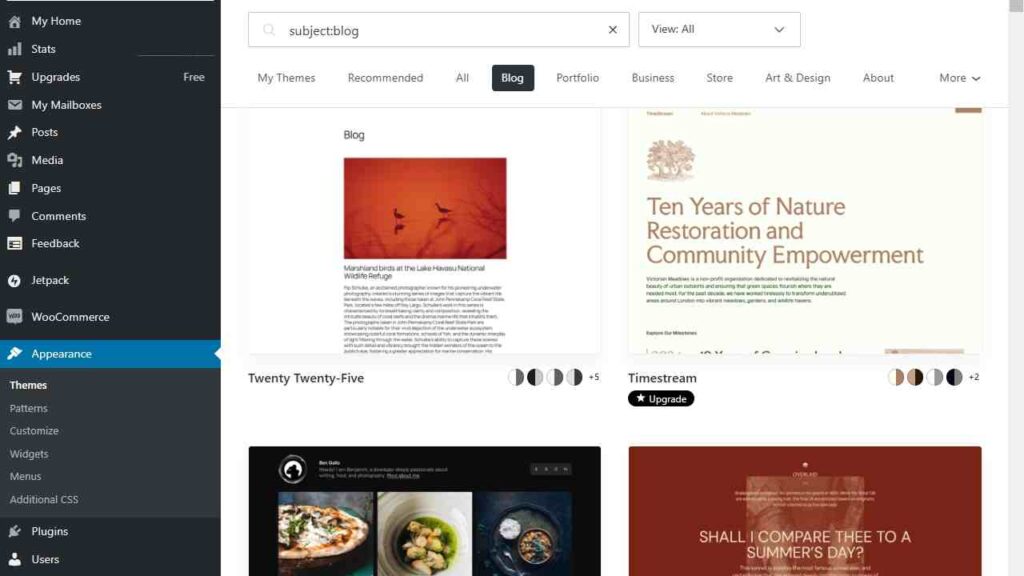
How to Install a WordPress Theme:
- Go to Appearance > Themes from your WordPress dashboard.
- Click Add New and browse through available themes.
- Preview themes and select one that fits your website’s purpose.
- Click Install and then Activate.
If you want a more professional-looking website, consider purchasing a premium theme from providers like ThemeForest or Elegant Themes.
Step 5: Add Essential Pages to Your Website
Your website should have essential pages that provide information about your business or purpose. Some key pages include:
✅ Home Page – The main landing page that introduces your site.
✅ About Us – Provides details about your business, mission, and values.
✅ Services/Products – Lists the services or products you offer.
✅ Contact Page – Displays contact details and a form for inquiries.
How to Create a New Page in WordPress:
- Go to Pages > Add New.
- Enter a title and add content.
- Click Publish when you’re ready.
Step 6: Customize Your Website
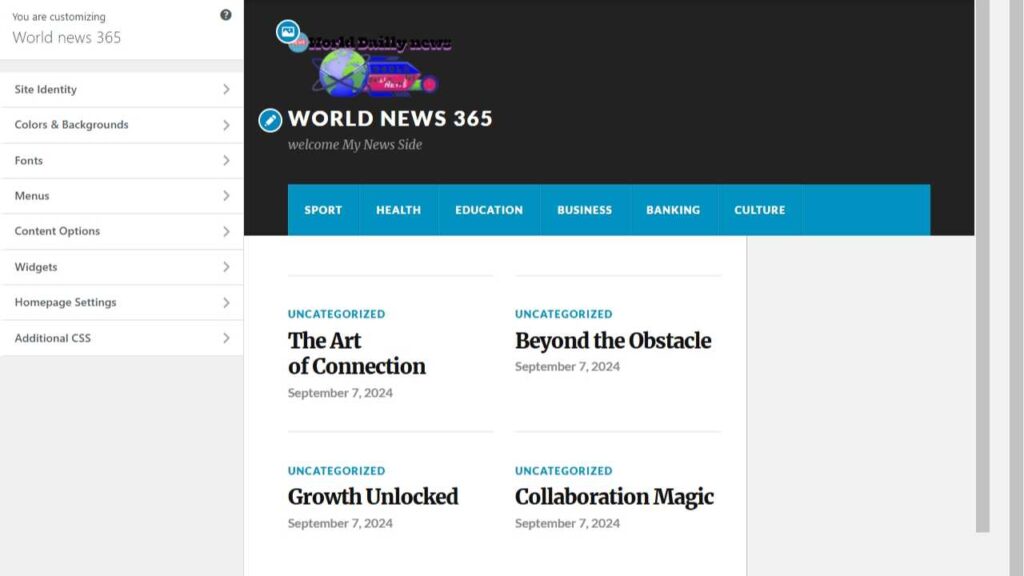
After adding essential pages, it’s time to customize the website’s look and functionality.
Ways to Customize Your Website:
✅ Customize the Menu – Go to Appearance > Menus and create a navigation menu.
✅ Add Widgets – Widgets allow you to add features like search bars, categories, and social media icons.
✅ Install Plugins – Plugins extend the functionality of your website. Some essential plugins include:
- Yoast SEO (for search engine optimization)
- Elementor (for easy page building)
- WPForms (for contact forms)
- WooCommerce (for online stores)
Step 7: Secure and Optimize Your Website
Website security and performance optimization are crucial to ensure smooth operation.
Security Tips:
✅ Use a strong password and update it regularly.
✅ Install a security plugin like Wordfence or Sucuri.
✅ Enable an SSL certificate (usually provided for free by your hosting provider).
Performance Optimization Tips:
✅ Use a caching plugin like WP Rocket.
✅ Optimize images using Smush or Imagify.
✅ Use a CDN (Content Delivery Network) like Cloudflare.
Step 8: Launch Your Website
Once you have completed the setup, reviewed the content, and tested all features, your website is ready to launch! Before making it live, make sure to:
✅ Check for broken links and errors.
✅ Ensure mobile responsiveness.
✅ Test loading speed using Google PageSpeed Insights.
✅ Announce your website launch on social media and through email marketing.
Final Thoughts
Creating a WordPress website is a straightforward process when you follow these steps. Whether you are building a blog, business website, or e-commerce store, WordPress offers endless customization options to meet your needs. Keep updating your website with fresh content and improvements to ensure long-term success.
Now that you have the knowledge, start building your WordPress website today! 🚀